
RPM Book
Vol. 2: 1959-1989
|
|
The Lincoln Cent RPM Book Vol. 2: 1959-1989 |
|||
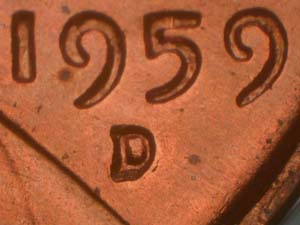
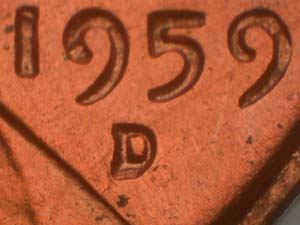
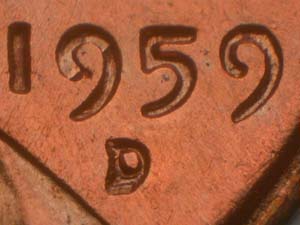
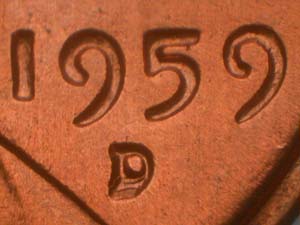
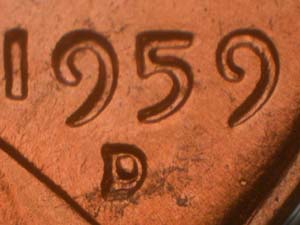
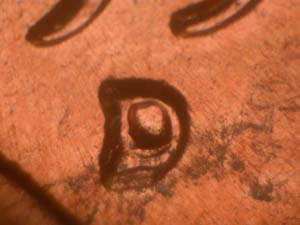
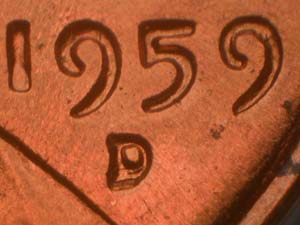
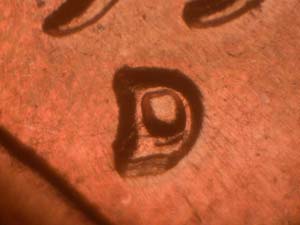
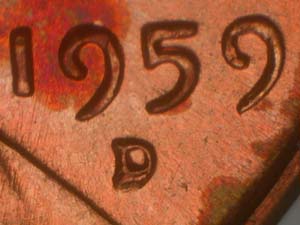
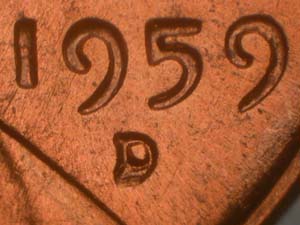
| 1959-D RPM-009 | ||||
|
|
|
|
|
|
|
|
||||||||||||||||||||||||||||||||||||||
|
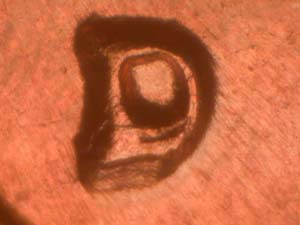
Reported by: Unknown Comments: D/D/D/D South, South, North. |
||||||||||||||||||||||||||||||||||||||
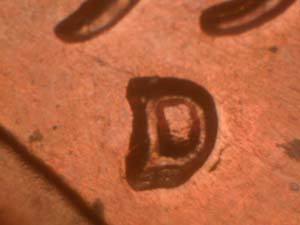
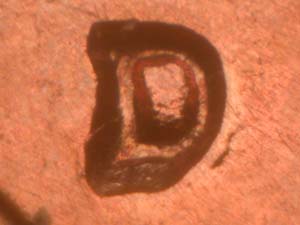
| Stage A Photos | ||||||||||||||||||||||||||||||||||||||
 |
 |
 |
||||||||||||||||||||||||||||||||||||
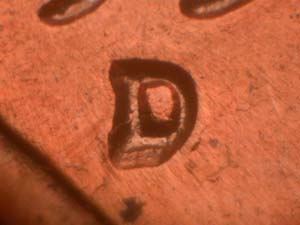
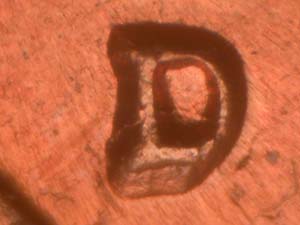
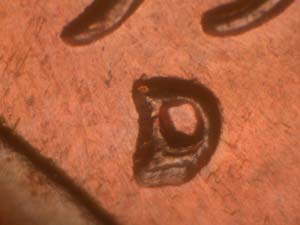
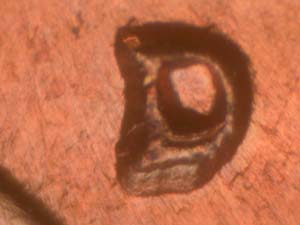
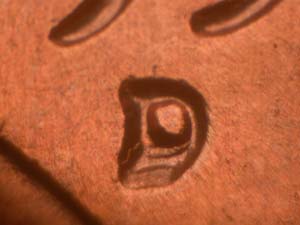
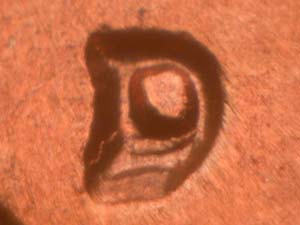
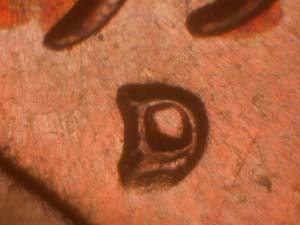
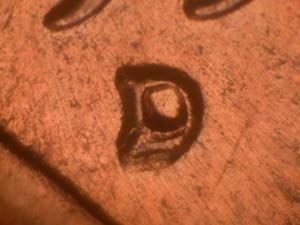
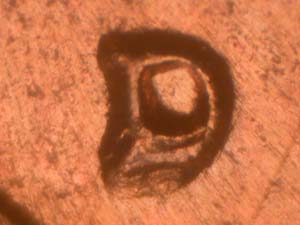
| Date and Mintmark | Mintmark Positioning | Magnified RPM | ||||||||||||||||||||||||||||||||||||
 |
 |
 |
||||||||||||||||||||||||||||||||||||
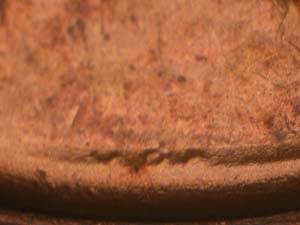
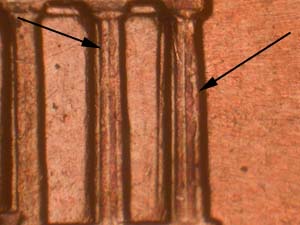
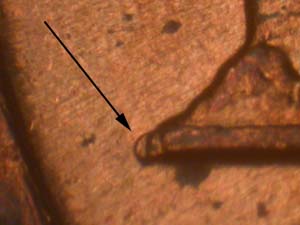
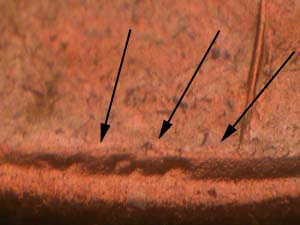
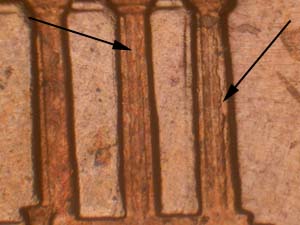
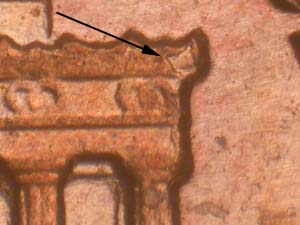
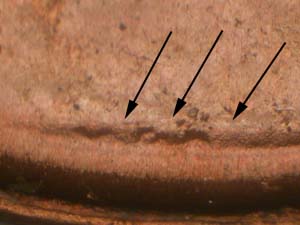
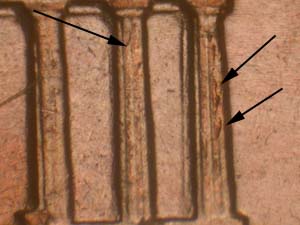
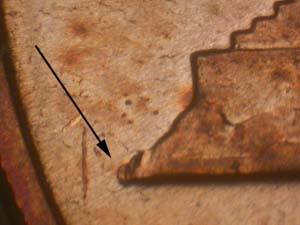
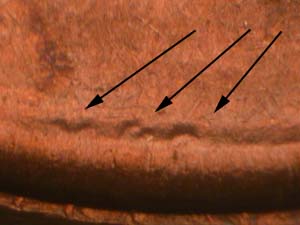
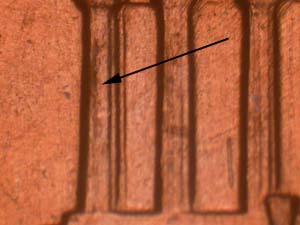
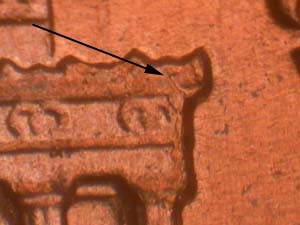
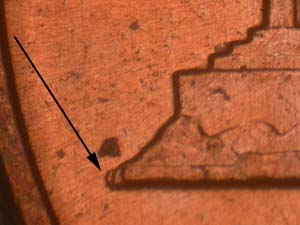
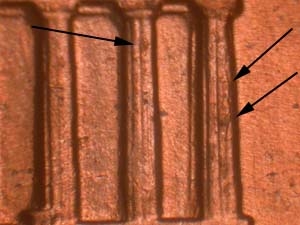
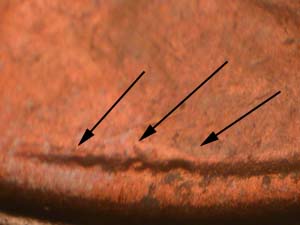
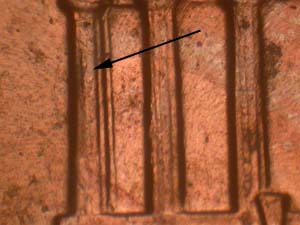
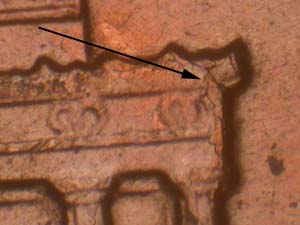
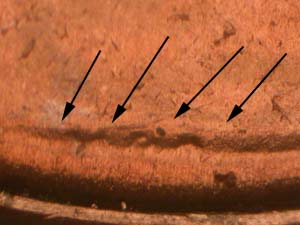
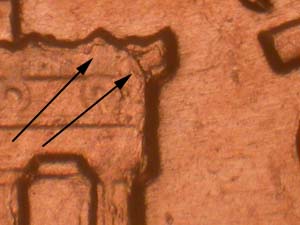
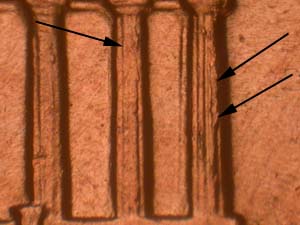
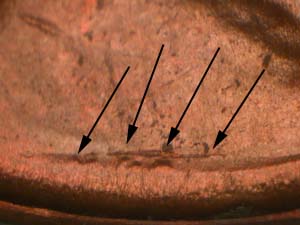
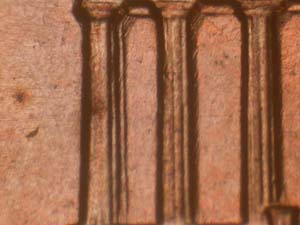
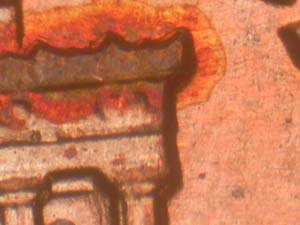
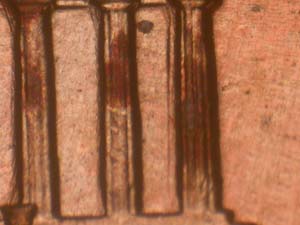
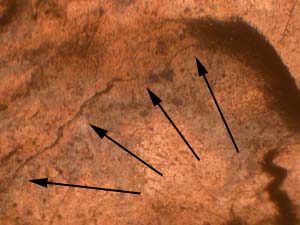
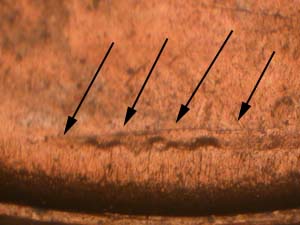
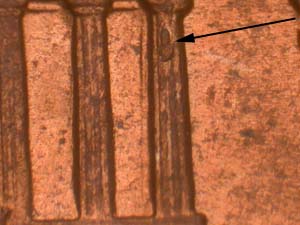
| No Die Crack over V.D.B. | Die Cracks on Columns #11 and 12 | Depression on Right Cornice | ||||||||||||||||||||||||||||||||||||
 |
||||||||||||||||||||||||||||||||||||||
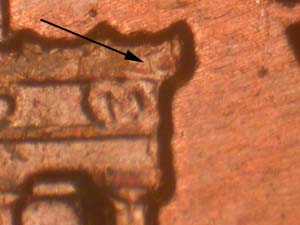
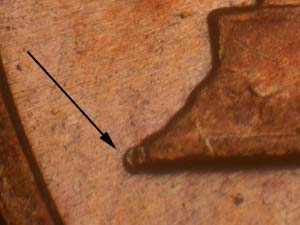
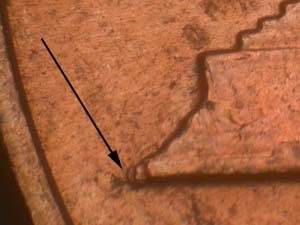
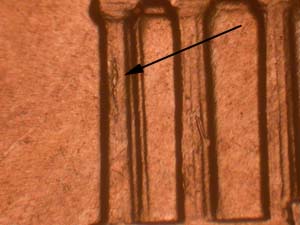
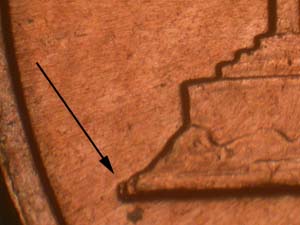
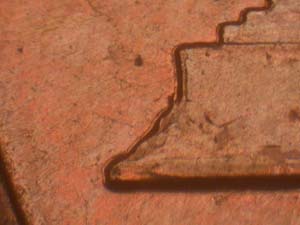
| Die Chip at Left Base Tip | ||||||||||||||||||||||||||||||||||||||
| Stage B Photos | ||||||||||||||||||||||||||||||||||||||
 |
 |
 |
||||||||||||||||||||||||||||||||||||
| Date and Mintmark | Mintmark Positioning | Magnified RPM | ||||||||||||||||||||||||||||||||||||
 |
 |
 |
||||||||||||||||||||||||||||||||||||
| Light Die Crack over V.D.B. | Die Cracks on Columns #11 and 12 | Depression on Right Cornice | ||||||||||||||||||||||||||||||||||||
 |
||||||||||||||||||||||||||||||||||||||
| Die Chip at Left Base Tip | ||||||||||||||||||||||||||||||||||||||
| Stage C Photos | ||||||||||||||||||||||||||||||||||||||
 |
 |
 |
||||||||||||||||||||||||||||||||||||
| Date and Mintmark | Mintmark Positioning | Magnified RPM | ||||||||||||||||||||||||||||||||||||
 |
 |
 |
||||||||||||||||||||||||||||||||||||
| Light Die Crack over V.D.B. | Die Crack and Chips on Columns #11 and 12 | Depression on Right Cornice | ||||||||||||||||||||||||||||||||||||
 |
||||||||||||||||||||||||||||||||||||||
| Die Chip at Left Base Tip | ||||||||||||||||||||||||||||||||||||||
| Stage D Photos | ||||||||||||||||||||||||||||||||||||||
 |
 |
 |
||||||||||||||||||||||||||||||||||||
| Date and Mintmark | Mintmark Positioning | Magnified RPM | ||||||||||||||||||||||||||||||||||||
 |
 |
 |
||||||||||||||||||||||||||||||||||||
| Light Die Crack over V.D.B. | Die Crack on Column # 1 | Depression on Right Cornice | ||||||||||||||||||||||||||||||||||||
 |
 |
|||||||||||||||||||||||||||||||||||||
| Die Chip at Left Base Tip | Die Crack and Chips on Columns #11 and 12 | |||||||||||||||||||||||||||||||||||||
| Stage E Photos | ||||||||||||||||||||||||||||||||||||||
 |
 |
 |
||||||||||||||||||||||||||||||||||||
| Date and Mintmark | Mintmark Positioning | Magnified RPM | ||||||||||||||||||||||||||||||||||||
 |
 |
 |
||||||||||||||||||||||||||||||||||||
| Light Die Crack over V.D.B. | Die Crack on Column # 1 | Depression on Right Cornice | ||||||||||||||||||||||||||||||||||||
 |
 |
|||||||||||||||||||||||||||||||||||||
| Die Chip at Left Base Tip | Die Crack and Chips on Columns #11 and 12 | |||||||||||||||||||||||||||||||||||||
| Stage F Photos | ||||||||||||||||||||||||||||||||||||||
 |
 |
 |
||||||||||||||||||||||||||||||||||||
| Date and Mintmark | Mintmark Positioning | Magnified RPM | ||||||||||||||||||||||||||||||||||||
 |
 |
 |
||||||||||||||||||||||||||||||||||||
| Light Die Crack over V.D.B. | Die Crack on Column # 1 | Small Die Chip on Right Roof | ||||||||||||||||||||||||||||||||||||
 |
 |
|||||||||||||||||||||||||||||||||||||
| Die Chip at Left Base Tip | Die Crack and Chips on Columns #11 and 12 | |||||||||||||||||||||||||||||||||||||
| Stage G Photos | ||||||||||||||||||||||||||||||||||||||
 |
 |
 |
||||||||||||||||||||||||||||||||||||
| Date and Mintmark | Mintmark Positioning | Magnified RPM | ||||||||||||||||||||||||||||||||||||
 |
 |
 |
||||||||||||||||||||||||||||||||||||
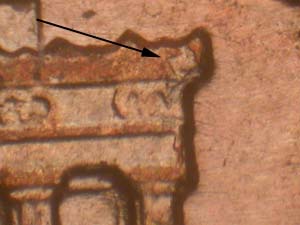
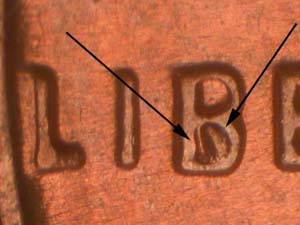
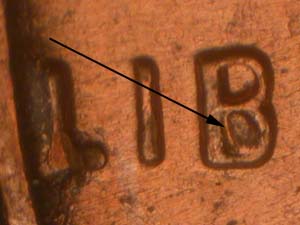
| Die Crack on Forehead | Die Chip in Lower B of LIBERTY | Die Crack over V.D.B. | ||||||||||||||||||||||||||||||||||||
 |
 |
|||||||||||||||||||||||||||||||||||||
| No Die Crack on Column # 1 | No Die Chip on Right Cornice | |||||||||||||||||||||||||||||||||||||
 |
 |
|||||||||||||||||||||||||||||||||||||
| No Die Chip at Left Base Tip | No Die Chips on Column #12 | |||||||||||||||||||||||||||||||||||||
| Stage H Photos | ||||||||||||||||||||||||||||||||||||||
 |
 |
 |
||||||||||||||||||||||||||||||||||||
| Date and Mintmark | Mintmark Positioning | Magnified RPM | ||||||||||||||||||||||||||||||||||||
 |
 |
 |
||||||||||||||||||||||||||||||||||||
| Die Crack on Forehead | Die Chip in Lower B of LIBERTY | Die Crack over V.D.B. | ||||||||||||||||||||||||||||||||||||
 |
||||||||||||||||||||||||||||||||||||||
| Die Chip on upper Column #12 | ||||||||||||||||||||||||||||||||||||||
| Die Stage and Markers Chart | ||||||||||||||||||||||||||||||||||||||
|
||||||||||||||||||||||||||||||||||||||
| Top of Page |
||||||||||||||||||||||||||||||||||||||
|
| Home | | RPM Listings | OMM Listings | | About the Author | |
||||||||||||||||||||||||||||||||||||||
|
Copyright James Wiles, 2020 |
||||||||||||||||||||||||||||||||||||||